A solar installation starts long before panels arrive, because the site survey is where crews confirm what can actually be built on a specific home. Online designs and satellite tools are helpful, but they cannot fully capture roof wear, attic access, shading details, or the condition of electrical equipment. The survey visit turns a proposal into a build plan by measuring key dimensions and spotting constraints early, preventing change orders, delays, and last-minute redesigns. Homeowners often think the survey is only about roof size, yet crews also document roof structure, safety access, conduit paths, and utility interconnection details. Every measurement has a purpose, whether it is to calculate racking loads, choose a wiring route that looks clean, or verify that code requirements can be met without surprises. When the checklist is followed carefully, the installation day feels routine rather than chaotic, and the final system performs predictably because it matches the house as it actually exists.
What crews measure and why
- Roof layout, surfaces, and attachment planning
The roof assessment starts with verifying the areas where modules can be placed safely and efficiently. Crews measure the usable roof planes, note the pitch, record ridge and eave distances, and map obstacles like vents, skylights, chimneys, and plumbing stacks. They also document roof material type, such as asphalt shingle, tile, or metal, because attachment methods and flashing details change by surface. The condition of the roof matters as much as its size, since a roof near the end of its service life may trigger a recommendation to replace or repair before solar is installed. Crews also check for signs of soft decking, sagging sections, or prior leak repairs that could affect where standoffs and rails can land. A good survey includes photos from multiple angles and a sketch showing the required setbacks under local codes and fire access pathways. These details inform the engineering plan, ensuring the racking layout distributes weight properly and avoids attachment points that could compromise waterproofing.
- Shade mapping, sun exposure, and energy modeling
Shading is not a yes-or-no question, because a small shadow at the wrong time can reduce output across a string of modules. Crews measure shading with tools that evaluate sun paths across seasons and record which roof zones receive consistent exposure. They also note nearby trees, new construction risks, and roof features that cast shadows at different times of day. Even if a roof looks sunny at noon, morning and late-afternoon shade can influence inverter choice, string design, and whether module-level electronics make sense. A survey also captures orientation and tilt to refine the production estimate, since a small change in azimuth or pitch can shift annual output projections. This is where a team might confirm whether the design assumptions align with reality, since the initial proposal may have used generalized shade data. Many homeowners appreciate that crews explain the rationale behind the measurements, and companies like AWS Solar often use this step to show how layout choices directly connect to performance expectations.
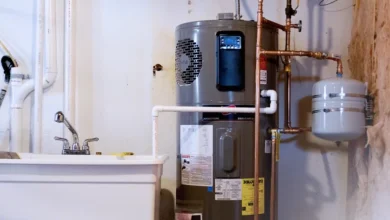
- Electrical service, panel capacity, and interconnection readiness
The electrical portion of the survey is where crews confirm that the home can safely accept a new power source. They measure the main service rating, inspect the main panel, and document breaker spaces and busbar ratings. They also check the meter location and type, because utility requirements vary and may affect where equipment is mounted. Another key measurement is distance, such as how far the array is from the main panel and where conduit can be run without creating awkward bends or exposed routes. Crews note grounding points, bonding requirements, and any obstacles that could complicate a code-compliant wiring path. They also look for existing loads that may affect upgrades, such as EV chargers, hot tubs, or electric range conversions, because these can change the service calculations. In some cases, the survey identifies the need for a panel upgrade, load management device, or a different interconnection method to meet code and utility limits without sacrificing safety.
Clear Checklist Takeaways Now
A solar site survey is a measured, methodical process that turns a concept into a buildable plan by verifying the roof, sun exposure, electrical system, and on-site safety conditions. Roof measurements and obstacle mapping guide a layout that respects setbacks, waterproofing needs, and attachment spacing. Shade assessments refine production expectations and help determine equipment choices that handle partial shading without unnecessary losses. Electrical checks confirm service compatibility, reveal whether upgrades are needed, and define conduit routes that meet code while keeping the finish neat. Structural observations and access planning protect both the home and the crew by ensuring the roof can handle the system and the work can be performed safely. When these checklist items are captured with photos, distances, and clear notes, permitting and installation move faster because fewer surprises remain. The result is a solar system designed around the property’s actual conditions, with performance and reliability tied to measurements that crews can explain and homeowners can understand.