Wallpaper can look crisp and seamless, but only when the surface beneath is stable, clean, and flat enough to support it. Uneven walls are common in older homes, renovated condos, and even newer builds where drywall finishing was rushed. Bumps, shallow dents, raised seams, nail pops, and patchy paint all telegraph through wallpaper, especially with lighter colors, metallic inks, grasscloth textures, or patterns that rely on straight lines. Even small variations can cause gaps at seams or make a repeating pattern drift as it climbs the wall. Installers prepare uneven walls so the adhesive bonds consistently and the paper sits without bridging over ridges or sinking into low spots. This preparation is not only about appearance. Proper surface work reduces the risk of lifting edges, bubbling, and premature peeling in humid rooms. The goal is to create a predictable wall so the wallpaper behaves as intended once it is hung.
Surface prep before the first panel
- Finding what is causing the unevenness
Installers start by identifying why the wall feels uneven, because different causes need different fixes. They run a straightedge across the wall to locate high spots and low spots, and they use raking light to reveal ridges, tape lines, and rough patches that normal overhead lighting hides. Drywall seams that were not feathered wide enough tend to create long, raised lines that can shadow under wallpaper. Glossy paint can create adhesion problems, even if the wall looks smooth, because the paste may not grip properly. Moisture issues show up as soft drywall, peeling paint, or faint staining, and those areas must be corrected before any patching or priming. Installers also check for loose joint tape, crumbling spackle, and tiny cracks near doors and windows where the framing moves. Corners are another trouble zone, since out-of-square corners can force the paper to wrinkle or pull. This inspection step helps them decide whether the wall needs minor skim work, broader leveling, or repairs that involve replacing damaged drywall sections rather than trying to hide weak material under wallpaper.
- Patching, skimming, and leveling the wall
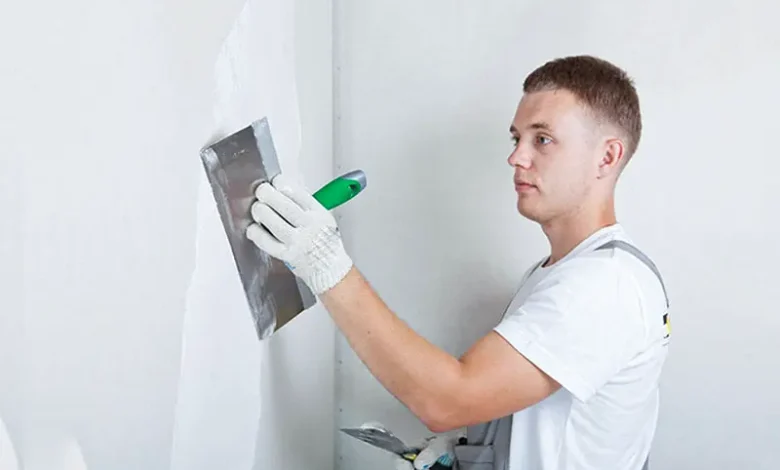
Once the issues are mapped, installers move into repair mode to bring the wall into a flatter plane. Small holes and dents are filled with patch compound and allowed to dry completely so they do not shrink under the paper later. Raised imperfections, such as paint drips or old adhesive ridges, are scraped down first because filling around a bump only makes it taller. For walls with heavy texture or inconsistent drywall finishing, many installers apply a skim coat, a thin layer of joint compound spread evenly to level the surface. The aim is not to create a perfectly polished plaster wall, but to remove abrupt transitions that will print through. During this stage, careful tradespeople keep edges feathered and check progress with a straightedge to avoid creating new waves while fixing old ones. Many homeowners notice that the wall begins to look like a continuous sheet rather than a patchwork of repairs. A crew familiar with The Wallpaper Install of Fort Lauderdale may also plan prep based on the wallpaper type, since thicker vinyl can hide minor flaws. At the same time, natural fibers and matte papers reveal more, requiring tighter tolerances.
- Sanding and cleaning to allow the paste to bond.
After repairs are cured, sanding aligns everything and removes tool marks. Installers often use fine-grit sanding and move slowly to avoid gouging the surface or tearing paper facing on drywall. They blend patch edges into surrounding paint so the transition disappears to the touch, not just to the eye. Dust control matters, since sanding residue can interfere with primer adhesion and later with wallpaper paste. Contractors typically vacuum the wall, wipe it down, and make sure the surface is free of chalky paint, grease, or residue from household cleaners. In kitchens or near switches, oils from hands can cause spots where paste fails to adhere, so those areas may be cleaned with a degreaser and then rinsed. If the wall has old wallpaper glue, it must be removed rather than painted over, because leftover adhesive can reactivate and cause slipping seams or bubbles. Installers also check that the wall is dry, since humidity or damp compound under primer can trap moisture and lead to blistering. This step is often overlooked, but it is a major reason some wallpaper jobs fail even when the paper was applied carefully.
Prep work creates reliable results for years.
Preparing uneven walls is the foundation of a wallpaper installation that looks consistent and stays attached through daily living. Small dents, ridges, and mixed wall materials can cause visible shadows, drifting patterns, or seams that lift, so installers should start with an inspection and an honest evaluation of what the wall needs. They repair damage, knock down high spots, skim when necessary, and sand until the surface feels uniform. Cleaning removes dust and residue that weaken adhesion, and priming seals the wall so the paste behaves the same across patches and painted areas. Final layout checks ensure plumb starting lines and smart seam placement, which matters even more when walls are not perfectly square. When these steps are handled with care, wallpaper panels sit flatter, patterns align more easily, and the finish looks intentional rather than forced. The time spent on prep also protects the home later, since sealed walls are easier to maintain and future wallpaper removal is less likely to damage drywall. Uneven walls are common, but a disciplined prep routine turns them into a stable surface ready for clean installation.